In most of my SharePoint development environments and efforts, I
generally don't need to test out any email functionality. Occasionally
there will pop up something that absolutely needs this testing and like
most developers who have an isolated development environment, this can
be an issue. For me, I have a virtual machine that I host on my laptop,
which is not connected to a real Active Directory or SMTP server. So
how do we test email alerts for instance? Easy, connect your
environment to a public email service like Hotmail! Here is how you do
it.
First, get an email address at Hotmail (Outlook.com) or Gmail, if you don't already have one. You can certainly use your current one but you may want to create a dummy account for these purposes. For this post we'll be staying true to Microsoft and use Hotmail, but you can use any service that has an SMTP service available to you.
Now a couple of assumptions here:


Now that we have confirmed that SMTP is installed and running on the server, let's go into Internet Information Services (IIS) 6.0 Manager and configure it.

Right click on "[SMTP Virtual Server #1]" and click properties. Again, we'll assume this is a development environment and there is only 1 SMTP server listed here, and its not being used for anything else.

In the Properties window we'll be focusing on just two tabs: "Access" and "Delivery". Click the Access tab.

Here we'll first click the "Authentication" button and ensure the "Anonymous access" is checked.

Click OK here, and next on the "Access" tab we'll click "Connections". In this screen we can specify which computers can access this SMTP service. Since this is our development environment, its easiest to just set this to "All except the list below", and not provide any IPs. If this is not a development environment, you should switch it over to "Only the list below" and provide the IP of your machine.

Click OK and back on the "Access" tab we'll click "Relay". Just as above, we'll set this to "All except the list below", and not provide any IPs.

Click OK and you're done with the "Access" tab. Now click on the "Delivery" tab.

On the "Delivery" tab, we'll be focusing on "Outbound Security", "Outbound connections", and "Advanced", everything else will be left at its default setting.
Click "Outbound Security". Click "Basic Authentication" and enter your Hotmail email address and password. Make sure you have "TLS encryption" checked as Hotmail requires this.

Click OK, back on the "Delivery" tab click the "Outbound connections" button. Here we need to change the "TCP Port" to 587.

Click OK, and next click the "Advanced" button on the "Delivery" tab. Here we need to update three fields: "Masquerade domain", "Fully-qualified domain name", and "Smart Host". For the purposes of development, we can ignore the first two, kind of. We need to put something in there, so we'll add "dev.com" and "sharepoint.dev.com". For more info on these two items check this post at Exchangepedia. The most important part for us is the "Smart host", which needs to be our SMTP address for Hotmail.

Click OK, and you're done with the SMTP server.
Open a commnad line and perform and IIS reset.

With the command line still open, run ipconfig to get your local machine IP address, we'll need this in Central Administration in a moment.

Open Central Administration and click "Manage web applications".

Next click on your main Web Application, then from the "General Settings" ribbon button choose "Outgoing Email".

In the "Web Application Outgoing E-Mail Settings" modal, we'll want to change the "Outbound SMTP server" to the IP address we got from running the ipconfig command. Again since this is a development machine, we do not need to worry about the From and Reply To address, but as you'll see when we test, these get sent over in the email.

Click OK and you're done with Central Administration. Now, run another IIS reset!
This one may be overkill, but its nice to run this after changing something as global in Central Administration, plus its a double check in case you missed this first one.
Now let's test it! We'll surf to a list where we'll place an alert. For instance, we'll go to the Task list and click the "List" tab in the Ribbon. Hover over "Alert Me" and click "Set alert on this list".

In the modal, we can simply add an email address here to send the alerts to. We can put in a Gmail address for instance and leave everything else as its default value. This will ensure "Delivery Method" is email, "When to send alerts" is Immediate, and you will get an alert for any change to the list.

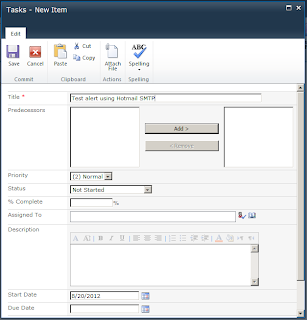
Now we just need to add a new item to the List.

Now just wait a few minutes and if everything works appropriately, you should receive a notification alert to your Gmail account.

After that you should start receiving alerts on changes, adds, etc.

Now let's take a look at the email details. As you can see, the From address is our Hotmail address, the reply-to is the address we saw in the "Outgoing Email Settings" in Central Administration. The mailed-by domain is hotmail.com.

And there you go. You now have a fairly easy way to setup SMTP service from your development environment using Hotmail or another SMTP service.
First, get an email address at Hotmail (Outlook.com) or Gmail, if you don't already have one. You can certainly use your current one but you may want to create a dummy account for these purposes. For this post we'll be staying true to Microsoft and use Hotmail, but you can use any service that has an SMTP service available to you.
Now a couple of assumptions here:
- You already have SharePoint installed and configured.
- You have SMTP installed on IIS 6.0. If you need to install this feature, refer to this MSDN article.
- Your environment is a true development environment and you can mess with the SMTP settings without any regard on the impact to other folks.
- You have the SMTP settings for your email service. If you need details on a particular service check this link.


Now that we have confirmed that SMTP is installed and running on the server, let's go into Internet Information Services (IIS) 6.0 Manager and configure it.

Right click on "[SMTP Virtual Server #1]" and click properties. Again, we'll assume this is a development environment and there is only 1 SMTP server listed here, and its not being used for anything else.

In the Properties window we'll be focusing on just two tabs: "Access" and "Delivery". Click the Access tab.

Here we'll first click the "Authentication" button and ensure the "Anonymous access" is checked.

Click OK here, and next on the "Access" tab we'll click "Connections". In this screen we can specify which computers can access this SMTP service. Since this is our development environment, its easiest to just set this to "All except the list below", and not provide any IPs. If this is not a development environment, you should switch it over to "Only the list below" and provide the IP of your machine.

Click OK and back on the "Access" tab we'll click "Relay". Just as above, we'll set this to "All except the list below", and not provide any IPs.

Click OK and you're done with the "Access" tab. Now click on the "Delivery" tab.

On the "Delivery" tab, we'll be focusing on "Outbound Security", "Outbound connections", and "Advanced", everything else will be left at its default setting.
Click "Outbound Security". Click "Basic Authentication" and enter your Hotmail email address and password. Make sure you have "TLS encryption" checked as Hotmail requires this.

Click OK, back on the "Delivery" tab click the "Outbound connections" button. Here we need to change the "TCP Port" to 587.

Click OK, and next click the "Advanced" button on the "Delivery" tab. Here we need to update three fields: "Masquerade domain", "Fully-qualified domain name", and "Smart Host". For the purposes of development, we can ignore the first two, kind of. We need to put something in there, so we'll add "dev.com" and "sharepoint.dev.com". For more info on these two items check this post at Exchangepedia. The most important part for us is the "Smart host", which needs to be our SMTP address for Hotmail.

Click OK, and you're done with the SMTP server.
Open a commnad line and perform and IIS reset.

With the command line still open, run ipconfig to get your local machine IP address, we'll need this in Central Administration in a moment.

Open Central Administration and click "Manage web applications".

Next click on your main Web Application, then from the "General Settings" ribbon button choose "Outgoing Email".

In the "Web Application Outgoing E-Mail Settings" modal, we'll want to change the "Outbound SMTP server" to the IP address we got from running the ipconfig command. Again since this is a development machine, we do not need to worry about the From and Reply To address, but as you'll see when we test, these get sent over in the email.

Click OK and you're done with Central Administration. Now, run another IIS reset!
This one may be overkill, but its nice to run this after changing something as global in Central Administration, plus its a double check in case you missed this first one.
Now let's test it! We'll surf to a list where we'll place an alert. For instance, we'll go to the Task list and click the "List" tab in the Ribbon. Hover over "Alert Me" and click "Set alert on this list".

In the modal, we can simply add an email address here to send the alerts to. We can put in a Gmail address for instance and leave everything else as its default value. This will ensure "Delivery Method" is email, "When to send alerts" is Immediate, and you will get an alert for any change to the list.

Now we just need to add a new item to the List.


Now just wait a few minutes and if everything works appropriately, you should receive a notification alert to your Gmail account.
After that you should start receiving alerts on changes, adds, etc.

Now let's take a look at the email details. As you can see, the From address is our Hotmail address, the reply-to is the address we saw in the "Outgoing Email Settings" in Central Administration. The mailed-by domain is hotmail.com.

And there you go. You now have a fairly easy way to setup SMTP service from your development environment using Hotmail or another SMTP service.
Hiç yorum yok:
Yorum Gönder